
 |
|||||||||||||||
|
"AAAAAAhhhhhhhhhhhhhh!!!!!!!!!!!!!!!!!!" That's what you're probably saiing right now if your tryin' to prune your own wiring harness right now. You know, it's actually not that difficult if you take your time and be methodical about removing circuits. The first thing I did was lay each harness out on a sheet in the living room and strip all of the tape and lume off. I did it in the living room so I could watch Speedvision at the same time. |
|||||||||||||||
 |
|||||||||||||||
|
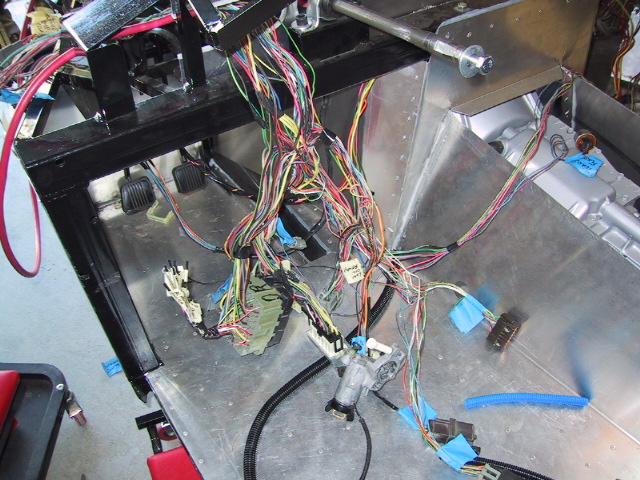
I started with the rear harness because it seemed the easiest with the fewest circuits. As you can see in this picture, I labeled every plug before starting the pruning process. This way I could see what I was (and was not) removing. The key here was just to make sure that I didn't create an open in a completed circuit by removing a component. Not too difficult. In fact this one only took me about 2 hours while reading that part of the schematic for the first time and tracing all the curcuits before cutting |
|||||||||||||||
| To trace the circuits I used a combination of the Chiltons manual and the Helms schematics. I would recommend having both since I there are some things that you will find in one that are not in the other. The picture on the right shows one page out of the Helm schematic. Much easier to read. |  |
 |
|||||||||||||
 |
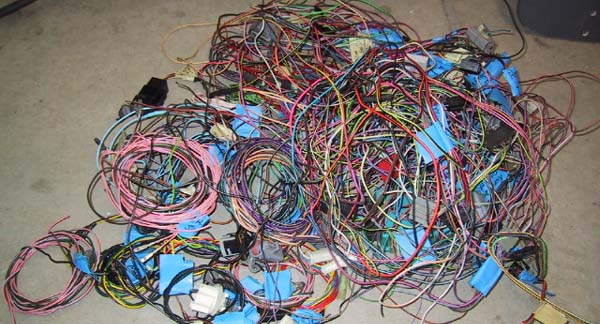
The next portion was the dash harness (or the portion with the box and airbag module attached. This one was a little more intimidating, but I just followed the same process. You wouldn't beleive how much stuff comes out of this one. Well after seeing the picture at the top maybe you would. |
||||||||||||||
| Well, to make a long story short I continued this process with the EEC harness and the front harness as well, and I compiled a list of circuits/plugs that I removed. Hope this helps anyone out there that is trying this themselves. | |||||||||||||||
|
Air Bag Circuitry: |
Lights: | Accessories | |||||||||||||
|
Air bag control module |
Hood lamp |
Power Access. switch Power Access. control breaker Blower motor resistor Blower motor Washer pump motor Wiper motors Wiper washer switch Washer pump test Wiper governor assembly A/C blower switch A/C blower motor A/C mode switch A/C jumper WOT Cut out circuit Lft. & Rt. Power miror controls Seat pad adjust Rear defroster Back window heat control relay Convertible. top/Defrost switch Trunk lid switch Deck lid release switch Chime module |
|||||||||||||
| Audio: | |||||||||||||||
|
Audio rheostat |
|||||||||||||||
| Misc: | |||||||||||||||
| Speed control amp Dual brake warning switch Brake shift interlock Clutch interlock switch Parking brake signal PRNDL Circtuit Seat belt circtuit Low oil sensor Low oil signal relay Ignition key warning switch |
|||||||||||||||
| My understanding is that all of these circuits can go since you wont be using them. There were some that I thought might be good to keep like the blower motors and wiper motors etc., if I was going to have these accessories. However, it turns out that these accessories will come with controls from the manufacturer. | |||||||||||||||
 |
|||||||||||||||
| One precaution that I did take was to trim all of the wires coming from the Fuse box (for the circuits that I removed) leaving them long enough so that I could use them for added accessories later if I needed hot leads. You can see the pigtail of leads coming out of the fuse box in this picture. | |||||||||||||||
| I started buttoning up the wiring from the rear passenger corner. Starting from the right tail lights I covered the wiring with new wire lume and fastened it to the frame with small wiring brackets and self threading screws. I might have gone a little overkill here but I know I'll never have to wory about the wiring falling apart. Here is a picture of what I'm talking about. | |||||||||||||||
 |
|||||||||||||||